Language | Culture (ll-cc) | Native name | Extent of localization | Description | Links | Download Instructions |
Hindi | hi-in | हिंदी | Partial | The pack includes: Display in selected language Help in selected language Proofing tools for selected language
This pack does not include Project or Visio | Download (32-bit) Download (64-bit) | |
Step 2: Configure Office language
After you install the language accessory pack, you must configure Office for your new language preferences. This configuration affects all your Office applications.
Note: If you're using Office 365 and the commands available are different from what's shown here, click the Office 2016 tab and follow the instructions there.
In any Office application, on the File tab, select Options.
On the left, select Language.
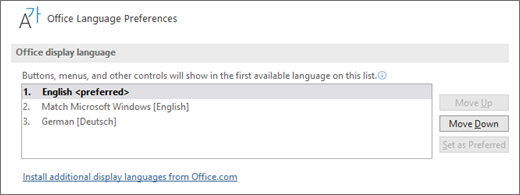
Under Office display Language, make sure the display language you want to use is listed.
Under Office authoring languages and proofing, make sure the language you want to use for authoring your document is listed.
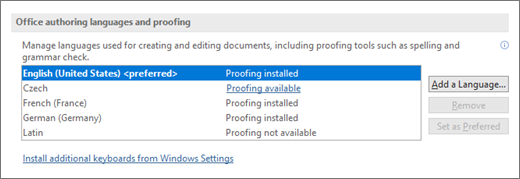
If the language accessory pack includes proofing tools for that language, its status appears as Proofing installed. If the status is Proofing available, click the link to install the proofing tools.
Restart all programs for your changes to take effect.
You can change the default language for all your Office applications in the Set the Office Language Preferences dialog. For more information, see Add a language or set language preferences in Office.
Note- This Artical Are Copy of Official Microsoft website, all credit are going to microsoft


 Physical test, Hall Ticket")


.png)


